
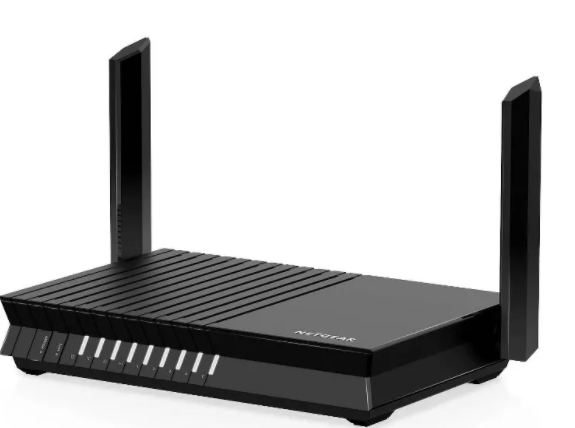
A NETGEAR WiFi firmware update can sometimes leave you with a router that appears to work but no longer provides WiFi correctly. The quickest way to diagnose the problem is to determine whether the failure affects WiFi only, the entire router, or an attached NETGEAR extender.
Start by restarting the network, checking whether your WiFi network name is visible, and testing one device through Ethernet. If Ethernet works while WiFi does not, concentrate on the router’s wireless configuration rather than your ISP connection. NETGEAR’s wireless troubleshooting guidance likewise separates wireless problems from broader internet-connectivity issues.
Quick fix: Restart the modem and router, check whether the NETGEAR WiFi network is visible, test Ethernet, then inspect the router’s wireless settings. If an extender is affected, troubleshoot it separately through its local management interface.
First, identify what actually stopped working
“WiFi isn’t working” can mean several different things.
You might see:
● The WiFi network has disappeared completely.
● The network appears but devices cannot connect.
● Devices connect but show “No Internet.”
● Ethernet works while WiFi does not.
● The router repeatedly reboots.
● Only your NETGEAR extender stopped working.
● You can connect to WiFi but cannot open the router’s settings.
These symptoms point toward different causes, so don’t immediately reset the router.
| What you’re seeing | What to investigate first |
| WiFi network disappeared | Wireless radio and configuration |
| WiFi visible but won’t connect | Password and security settings |
| WiFi connects but no internet | WAN/modem/ISP connection |
| Ethernet works, WiFi doesn’t | Wireless configuration |
| Router keeps rebooting | Firmware, power, or hardware |
| Extender stopped working | Extender connection/configuration |
| Router settings unavailable | Local network or router access |
1. Restart the modem and NETGEAR router
If the firmware update has already completed, restart the network before changing configuration.
Follow this order:
- Turn off the NETGEAR router.
- Turn off your modem or gateway.
- Wait briefly.
- Turn the modem back on.
- Wait until its connection is established.
- Turn the NETGEAR router back on.
- Wait for the router to finish starting.
- Test WiFi again.
A restart can clear temporary software or connection problems without intentionally erasing your customized settings.
Don’t interrupt an active firmware update
If the router is still performing a firmware upgrade, do not unplug it. NETGEAR specifically warns that interrupting a firmware update can corrupt the firmware and instructs users to wait until the router finishes restarting. NETGEAR firmware update instructions.
This distinction is important: restarting the router after an update has completed is different from powering it off while the firmware is actively being installed.
2. Check whether your NETGEAR WiFi network is visible
Open the WiFi menu on your phone, laptop, or another wireless device.
If the network name is visible
Try connecting to it.
If the device rejects the password, make sure you’re entering the current WiFi password rather than the router administrator password.
If multiple devices fail to connect, the problem is more likely to be on the router side.
If the network name has disappeared
The router may not be broadcasting the wireless network correctly.
If you can connect to the router using Ethernet, log in to its administration interface and check whether the wireless bands are enabled.
This is particularly useful after a firmware update because you’re checking the configuration directly rather than guessing whether the router’s wireless hardware has failed.
3. Test Ethernet before changing anything major
This is one of the most useful tests you can perform.
Connect a computer directly to a LAN port on the NETGEAR router with an Ethernet cable.
Then test the internet.
If Ethernet works but WiFi doesn’t
Your router is still able to provide a network connection, so focus on the wireless side.
Check:
● 2.4 GHz WiFi
● 5 GHz WiFi
● SSID/network name
● WiFi password
● Wireless security
● Access-control settings
● Wireless channel configuration
NETGEAR’s troubleshooting material specifically recommends using a wired connection to help determine whether the problem is with wireless connectivity or the broader router/internet connection.
If Ethernet also doesn’t work
The problem is broader than WiFi.
Check the router’s WAN connection, modem, cable connections, router status, and ISP service before assuming that the WiFi firmware itself is responsible.
4. Log in to your NETGEAR router
If Ethernet works, use that connection to access the router’s settings.
For compatible NETGEAR routers, open:
routerlogin.net
NETGEAR’s current firmware documentation uses routerlogin.net for accessing the router’s administration interface from a connected device.
Once you’re logged in, look through the wireless settings.
Check whether:
● 2.4 GHz is enabled.
● 5 GHz is enabled.
● Your usual SSID is still configured.
● Your WiFi password is correct.
● Wireless security is enabled appropriately.
● Access control is not blocking your devices.
Don’t change every setting at once. Make one change, test the connection, and then continue if necessary.
5. Check whether the SSID changed
Sometimes the problem isn’t that WiFi has completely disappeared. The router may simply be broadcasting a different network name than you expect.
Check the wireless settings for your configured SSID.
If you suddenly see a different network name after the firmware update, compare the current configuration with the settings you previously used.
Avoid changing the SSID immediately unless you have a reason to do so. Keeping the configuration stable makes troubleshooting easier because you’ll know which change affected the result.
6. Check both 2.4 GHz and 5 GHz WiFi
If only some devices stopped connecting, test both wireless bands.
For example, an older smart-home device may support 2.4 GHz but not 5 GHz, while a newer laptop may support both.
If one band works and the other doesn’t, you have narrowed the problem considerably.
Check whether the affected band is enabled and whether its wireless settings changed after the firmware update.
You can also test with a device known to support both bands. If that device can connect to one network but not the other, concentrate on the failing band instead of resetting the entire router.
7. Try another device
Before concluding that the router’s WiFi is broken, test another phone, laptop, or tablet.
For example:
Phone won’t connect → laptop connects normally
That suggests a device-specific issue may be involved.
But if:
Phone fails + laptop fails + TV fails
and all devices can see the WiFi network, the router’s wireless configuration becomes much more likely to be the problem.
This simple test prevents you from changing router settings when only one device has a corrupted or outdated saved WiFi profile.
8. Check for router reboots or unstable power
A router that repeatedly disconnects is different from a router that simply has incorrect WiFi settings.
Look for symptoms such as:
● Router restarting every few minutes
● WiFi disappearing and returning
● LEDs cycling repeatedly
● Router becoming temporarily inaccessible
● Internet dropping at regular intervals
If this started immediately after the firmware update, record the exact router model, hardware revision, and firmware version.
Also check the power adapter and outlet. A power problem can look like a firmware problem because the router may repeatedly reboot.
Don’t install another firmware file until you’ve confirmed exactly which firmware belongs to your specific model.
9. Verify the firmware version
If you can access the router, check which firmware version is currently installed.
Record it before attempting a rollback or another manual installation.
NETGEAR provides model-specific firmware downloads and instructions, and its manual-update procedure requires users to select the firmware associated with their particular router model.
If you’re considering manually installing an earlier version, first confirm:
- Router model
- Hardware revision
- Current firmware version
- Available firmware versions
- Release notes
- Compatibility of the firmware file
Never install a firmware file simply because its name looks similar to your router’s model.
10. Don’t immediately downgrade the firmware
A firmware rollback may appear to be the obvious solution when WiFi stops working immediately after an update.
But don’t make it your first move.
First determine whether the update actually caused the failure or whether the update simply exposed an existing configuration or compatibility problem.
NETGEAR’s current firmware documentation explains that updates are intended to improve performance, add features, and enhance security.
If a newer corrective release is available, it may be preferable to returning to an older firmware version.
If you eventually need to install a specific version, use NETGEAR’s official firmware instructions rather than downloading firmware from an unknown third-party website.
11. What if your NETGEAR extender stopped working?
If your main router’s WiFi works but the NETGEAR extender stopped working after the update, troubleshoot the extender separately.
First make sure:
● The extender is powered.
● The extender is close enough to the router for testing.
● Your device can see the extender’s WiFi network.
● The extender still has a connection to the main router.
NETGEAR maintains separate troubleshooting documentation for its WiFi range extenders, including connection, setup, and mywifiext.net access problems.
Use mywifiext.net correctly
If you need to configure the extender, connect your computer or phone to the extender and open:
mywifiext.net
This is important because mywifiext.net is not a normal public website. NETGEAR describes it as a local web address used to access the extender’s settings, meaning your device needs to be connected to the extender by WiFi or Ethernet.
If mywifiext.net doesn’t open, NETGEAR also documents alternatives including mywifiext.local and, for applicable extenders, 192.168.1.250.
12. Reconnect the extender if the router configuration changed
A router firmware update can change network settings that affect an extender’s connection.
If the extender can no longer communicate with the main router, you may need to reconnect it to the home network.
NETGEAR’s official reconnection procedure includes accessing the extender’s setup interface, checking the wireless settings, and ensuring the extender’s network key matches the router when appropriate.
For some models, a reset and fresh setup may be necessary.
Before doing that, however, check whether the extender simply lost its connection to the router.
13. Check access control and MAC filtering
If the extender connects to WiFi but devices connected through it cannot access the internet, check whether MAC address filtering or access control is enabled on the router.
NETGEAR documents a specific scenario where access-control settings can prevent devices connected through an extender from reaching the internet because the MAC addresses seen by the main router can differ from the addresses on the extender side.
If you recently changed router security settings after the firmware update, this is worth checking before resetting the extender.
14. Try the Nighthawk app if your router supports it
Some NETGEAR routers can be managed through the Nighthawk app.
If the browser interface is difficult to access but your router is functioning, the app can provide another way to view and manage supported router settings.
However, don’t use the app as a substitute for diagnosing a physical or firmware failure. If the router is continuously rebooting or neither wired nor wireless devices can communicate with it, the underlying problem needs to be addressed first.
15. Factory-reset only when necessary
A factory reset should be one of the final troubleshooting steps.
Resetting can remove customized settings such as:
● WiFi name
● WiFi password
● Guest network configuration
● Port forwarding
● Access-control rules
● Parental controls
● Other network settings
Before resetting, document anything you’ll need to recreate.
A reset makes sense when the router’s configuration appears corrupted, normal troubleshooting has failed, or NETGEAR’s model-specific recovery instructions recommend it.
It does not make sense as the first response simply because a firmware update was installed.
NETGEAR WiFi Troubleshooting Decision Tree
Use this sequence to narrow the problem quickly:
WiFi network disappeared?
→ Check whether wireless radios are enabled.
WiFi is visible but devices won’t connect?
→ Check password, security, SSID, and device-specific settings.
WiFi connects but there is no internet?
→ Test Ethernet and investigate the WAN/modem connection.
Ethernet works but WiFi doesn’t?
→ Focus on wireless configuration.
Router keeps rebooting?
→ Check power, firmware version, and router stability.
Only the extender stopped working?
→ Check the extender’s connection and mywifiext.net.
Nothing works after the update?
→ Record the exact model and firmware version, check official NETGEAR support documentation, and consider recovery or reset only after simpler troubleshooting fails.
Frequently Asked Questions
Can a NETGEAR firmware update cause WiFi problems?
A firmware update changes the software controlling the router, so a problem that appears immediately afterward deserves investigation. However, don’t automatically assume the firmware is defective. Configuration, power, WAN connectivity, device compatibility, and extender settings can create similar symptoms.
Why is my NETGEAR WiFi visible but not connecting?
Check the WiFi password, wireless security settings, SSID configuration, and whether the problem affects one device or several. If every device fails, focus on the router’s wireless configuration.
Why does Ethernet work but NETGEAR WiFi doesn’t?
That usually narrows the problem to the wireless side of the router. Check whether the wireless radios are enabled and review the 2.4 GHz and 5 GHz settings.
What should I do if my NETGEAR extender stopped working?
Confirm that the extender has power and is connected to the router. Then connect your device to the extender and open mywifiext.net. NETGEAR provides dedicated extender troubleshooting documentation for connection and configuration problems.
Why isn’t mywifiext.net opening?
mywifiext.net is a local address, not a conventional internet website. Your computer or phone must be connected directly to the NETGEAR extender by WiFi or Ethernet. NETGEAR also recommends alternatives such as mywifiext.local or 192.168.1.250 for applicable models. NETGEAR mywifiext.net troubleshooting
Should I reinstall the old firmware?
Not immediately. First verify your exact model and hardware revision and check NETGEAR’s official firmware resources. If you manually install firmware, use the correct file for the specific router and avoid interrupting the installation. NETGEAR manual firmware installation guidance
Should I factory-reset my NETGEAR router?
Only after simpler troubleshooting has failed or the manufacturer’s model-specific instructions recommend it. A reset can erase customized network settings and require you to configure the router again.
Final Takeaway
If your NETGEAR WiFi stopped working after a firmware update, don’t immediately reset the router or install another firmware version.
Start with the basics:
Restart the network → check whether the SSID is visible → test Ethernet → inspect wireless settings → test another device → verify the firmware version → troubleshoot any extender separately → reset only if necessary.
The Ethernet test is especially valuable. If Ethernet works while WiFi doesn’t, you’ve already established that the router can communicate with the network, so the investigation can focus on the wireless configuration.
If an extender is involved, remember that mywifiext.net is a local management address, so your device must actually be connected to the extender for the address to work.
And if you need to reinstall firmware, use the exact firmware intended for your NETGEAR model. NETGEAR’s current manual-update process requires selecting the appropriate model-specific firmware and warns users not to interrupt the router while the update is being installed.
The goal isn’t simply to get WiFi working again. It’s to identify which part of the network failed after the update so you can fix the actual problem without unnecessarily wiping the router’s configuration.
Source basis: The article follows the supplied content-generation requirements, including direct-answer-first structure, troubleshooting intent, evidence-aware writing, natural external sourcing, and avoidance of unsupported claims.